Digitization of photographic plates at AIP
Acquisition of a low resolution plate image
The major reason for the need of a low resolution plate image is to conserve any hand-written information on the glass side of a plate, which will be lost forever after cleaning in the next step. The minor reason is to create a small-size image which can be easily used as a preview of a plate, that will allow an end-user to have a quick look at a selected plate before downloading its high resolution image which is usually tens of times larger in size, for example 4 MB for a low-res image against 700 MB for a high-res image. If plates have no hand-written data on their glass side, then you can immediately clean plates, create their high resolution images and create low resolution images (for the preview purpose) from the already acquired high resolution images in a batch process; this approach will save much time.
To create a low resolution image there are at least two technical ways - with a scanner at 300 dpi optical resolution or with a digital camera at 5 Mpx or higher resolution, in both cases the output quality will be comparable and acceptable, if done properly. The main goal for you is that you can clearly recognize and read the hand-written data in the low resolution image.
If you have to digitize only from some hundreds to a couple of thousands of plates, it is better to use the same scanner with which you will create high resolution images, because then you don't need to purchase and properly prepare a digital camera set-up. If you have to digitize many thousands of plates, you must take more care of your scanner; excessive usage of the scanner will wear it sooner out. Thus, it is advisable to use a digital camera for this task to lessen the work-load of the scanner.
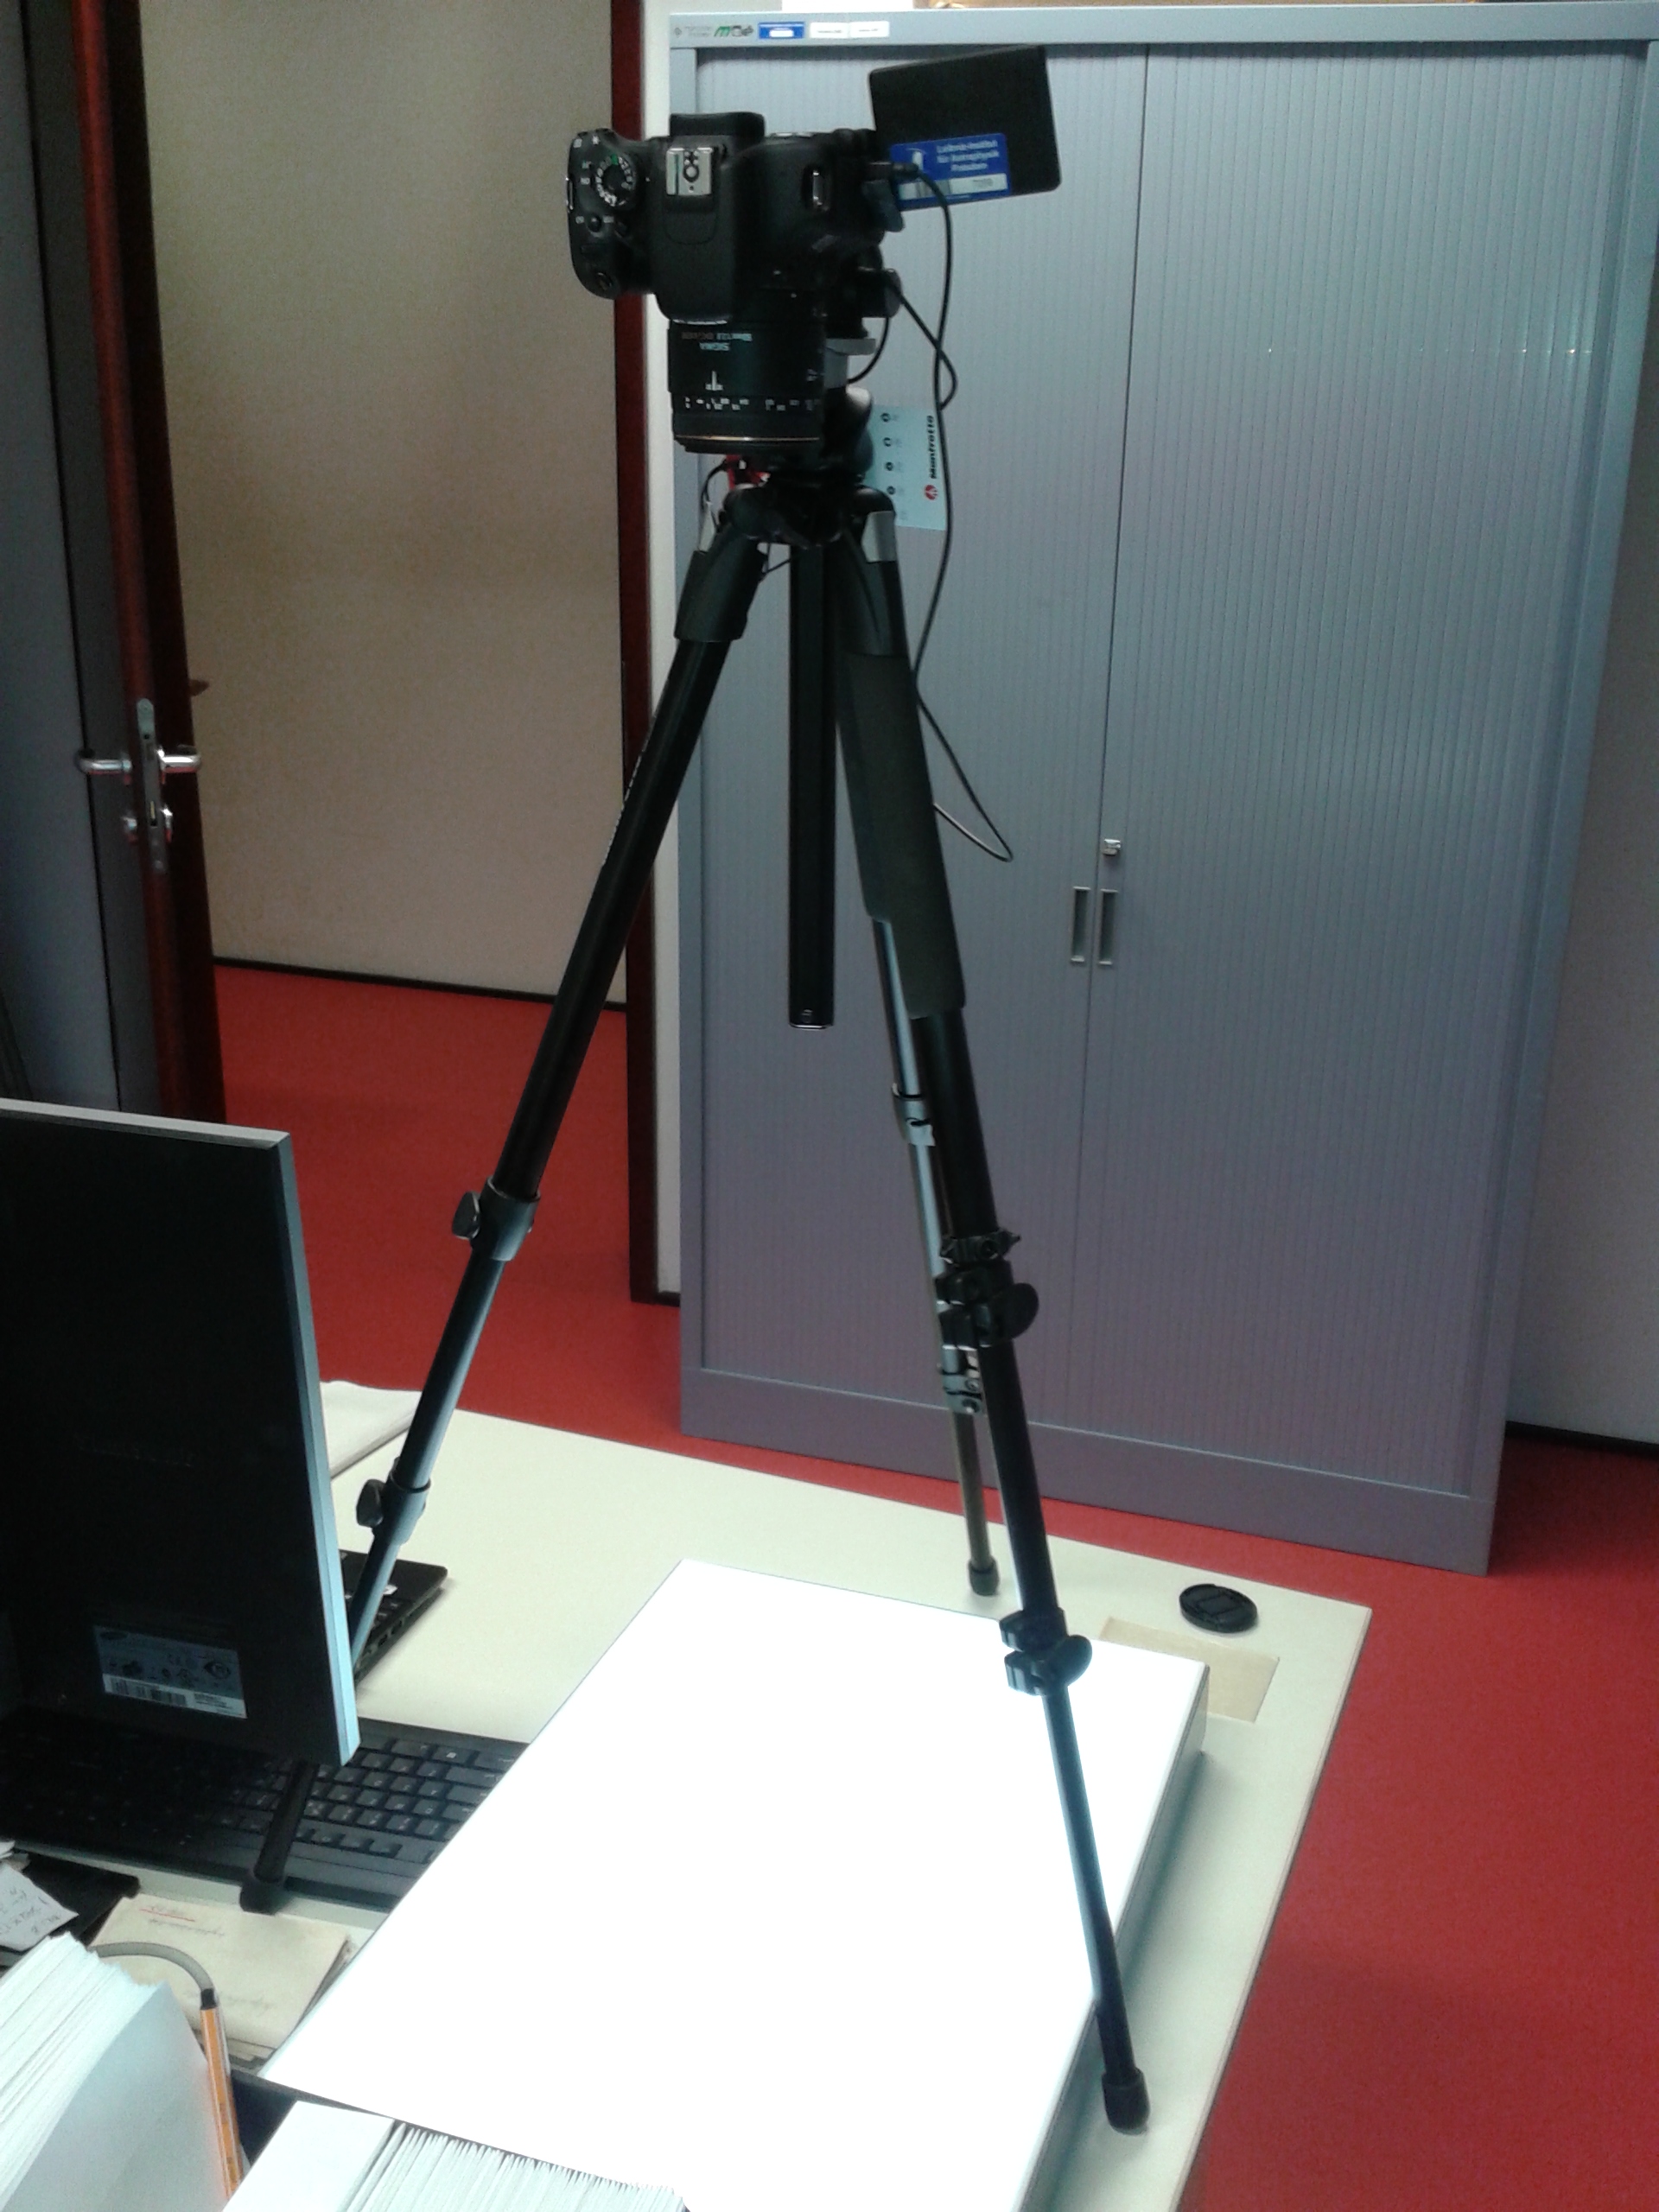
At the AIP, a camera is used. The camera set-up at the AIP consists of a Canon EOS 600D (exactly this model has a very practical live preview LCD screen which can be rotated in many different ways making it is for you to see the position and alignment of a plate on the light-box) equipped with the Sigma 50-mm F1:2.8 DG Macro lens and mounted on a Manfrotto 190XPROB tripod with a Cullmann Magnesit MB4.1 ball head. To avoid shaky images a Canon shutter release cable is used. The assembly is set above a negative viewer light-box with the lens looking down to the light-box. A 2GB SD-card is inserted into the camera.
Turn on the light-box and the camera. Make sure that the lens is set to auto-focus. Put cotton gloves on your hands (from here on you will always handle plates only while having gloves on your hands!). Carefully take a plate out of its envelope (if any) and position it on the light-box in such a way that it is not too much rotated in the field of view (in the camera's menu you can turn on the grid of the camera's LCD screen to help you with alignment of the plate along the grid lines in the live preview). Depending on the size and darkness of the plate make a suitable selection of settings on the camera for the ISO, aperture, shutter speed and focal length. When ready, half-press the button on the shutter release cable to focus on the plate, then press the button fully to take a picture. Put the plate back into its envelope. Proceed with next plates.
After you have acquired "raw" images you have to make the "final cut", namely, to crop the proper plate images by cutting off the surrounding area. For this purpose you can use any image editing software you like. At the AIP, the XnView freeware is used: with handy keyboard short-cuts you can easily rotate an image, make a rectangular area selection in the image, crop and save the final work in different graphical formats. For low resolution images JPEG or PNG formats are the best choice. When saving files, don't forget to immediately give them proper file names, by which they are easily identified and related to other files associated with the same plate (like, high resolution image or envelope image) or to the plate number which will be later on used in your database / plate archive. At the AIP, a low resolution image receives the same file name (according to the WFPDB metadata format, consisting of the observatory identifier, telescope aperture and plate number) as the corresponding high resolution image, so they differ only by their file type (file name extension), for example:
- POT015_000578.tif (high resolution image)
- POT015_000578.jpg (low resolution image)
With some experience in using a digital camera you should be able to make at least one low resolution image in 30 seconds. To finally cut and save the image it will take between 30 and 60 seconds per image. From the practical point of view, it is best first to make images of many plates and then cut them, instead of doing both steps for each plate separately one by one.
Important: At AIP, we store the low resolution images on at least two different machines. If you store the images only on one machine, you are exposed to the danger of losing non-recoverable data! If you lose high resolution image, you can always re-scan plates, but you can't restore hand-written data which is lost forever after cleaning. Thus, pay attention to proper back-up of newly created low resolution images.
Cleaning of the glass side
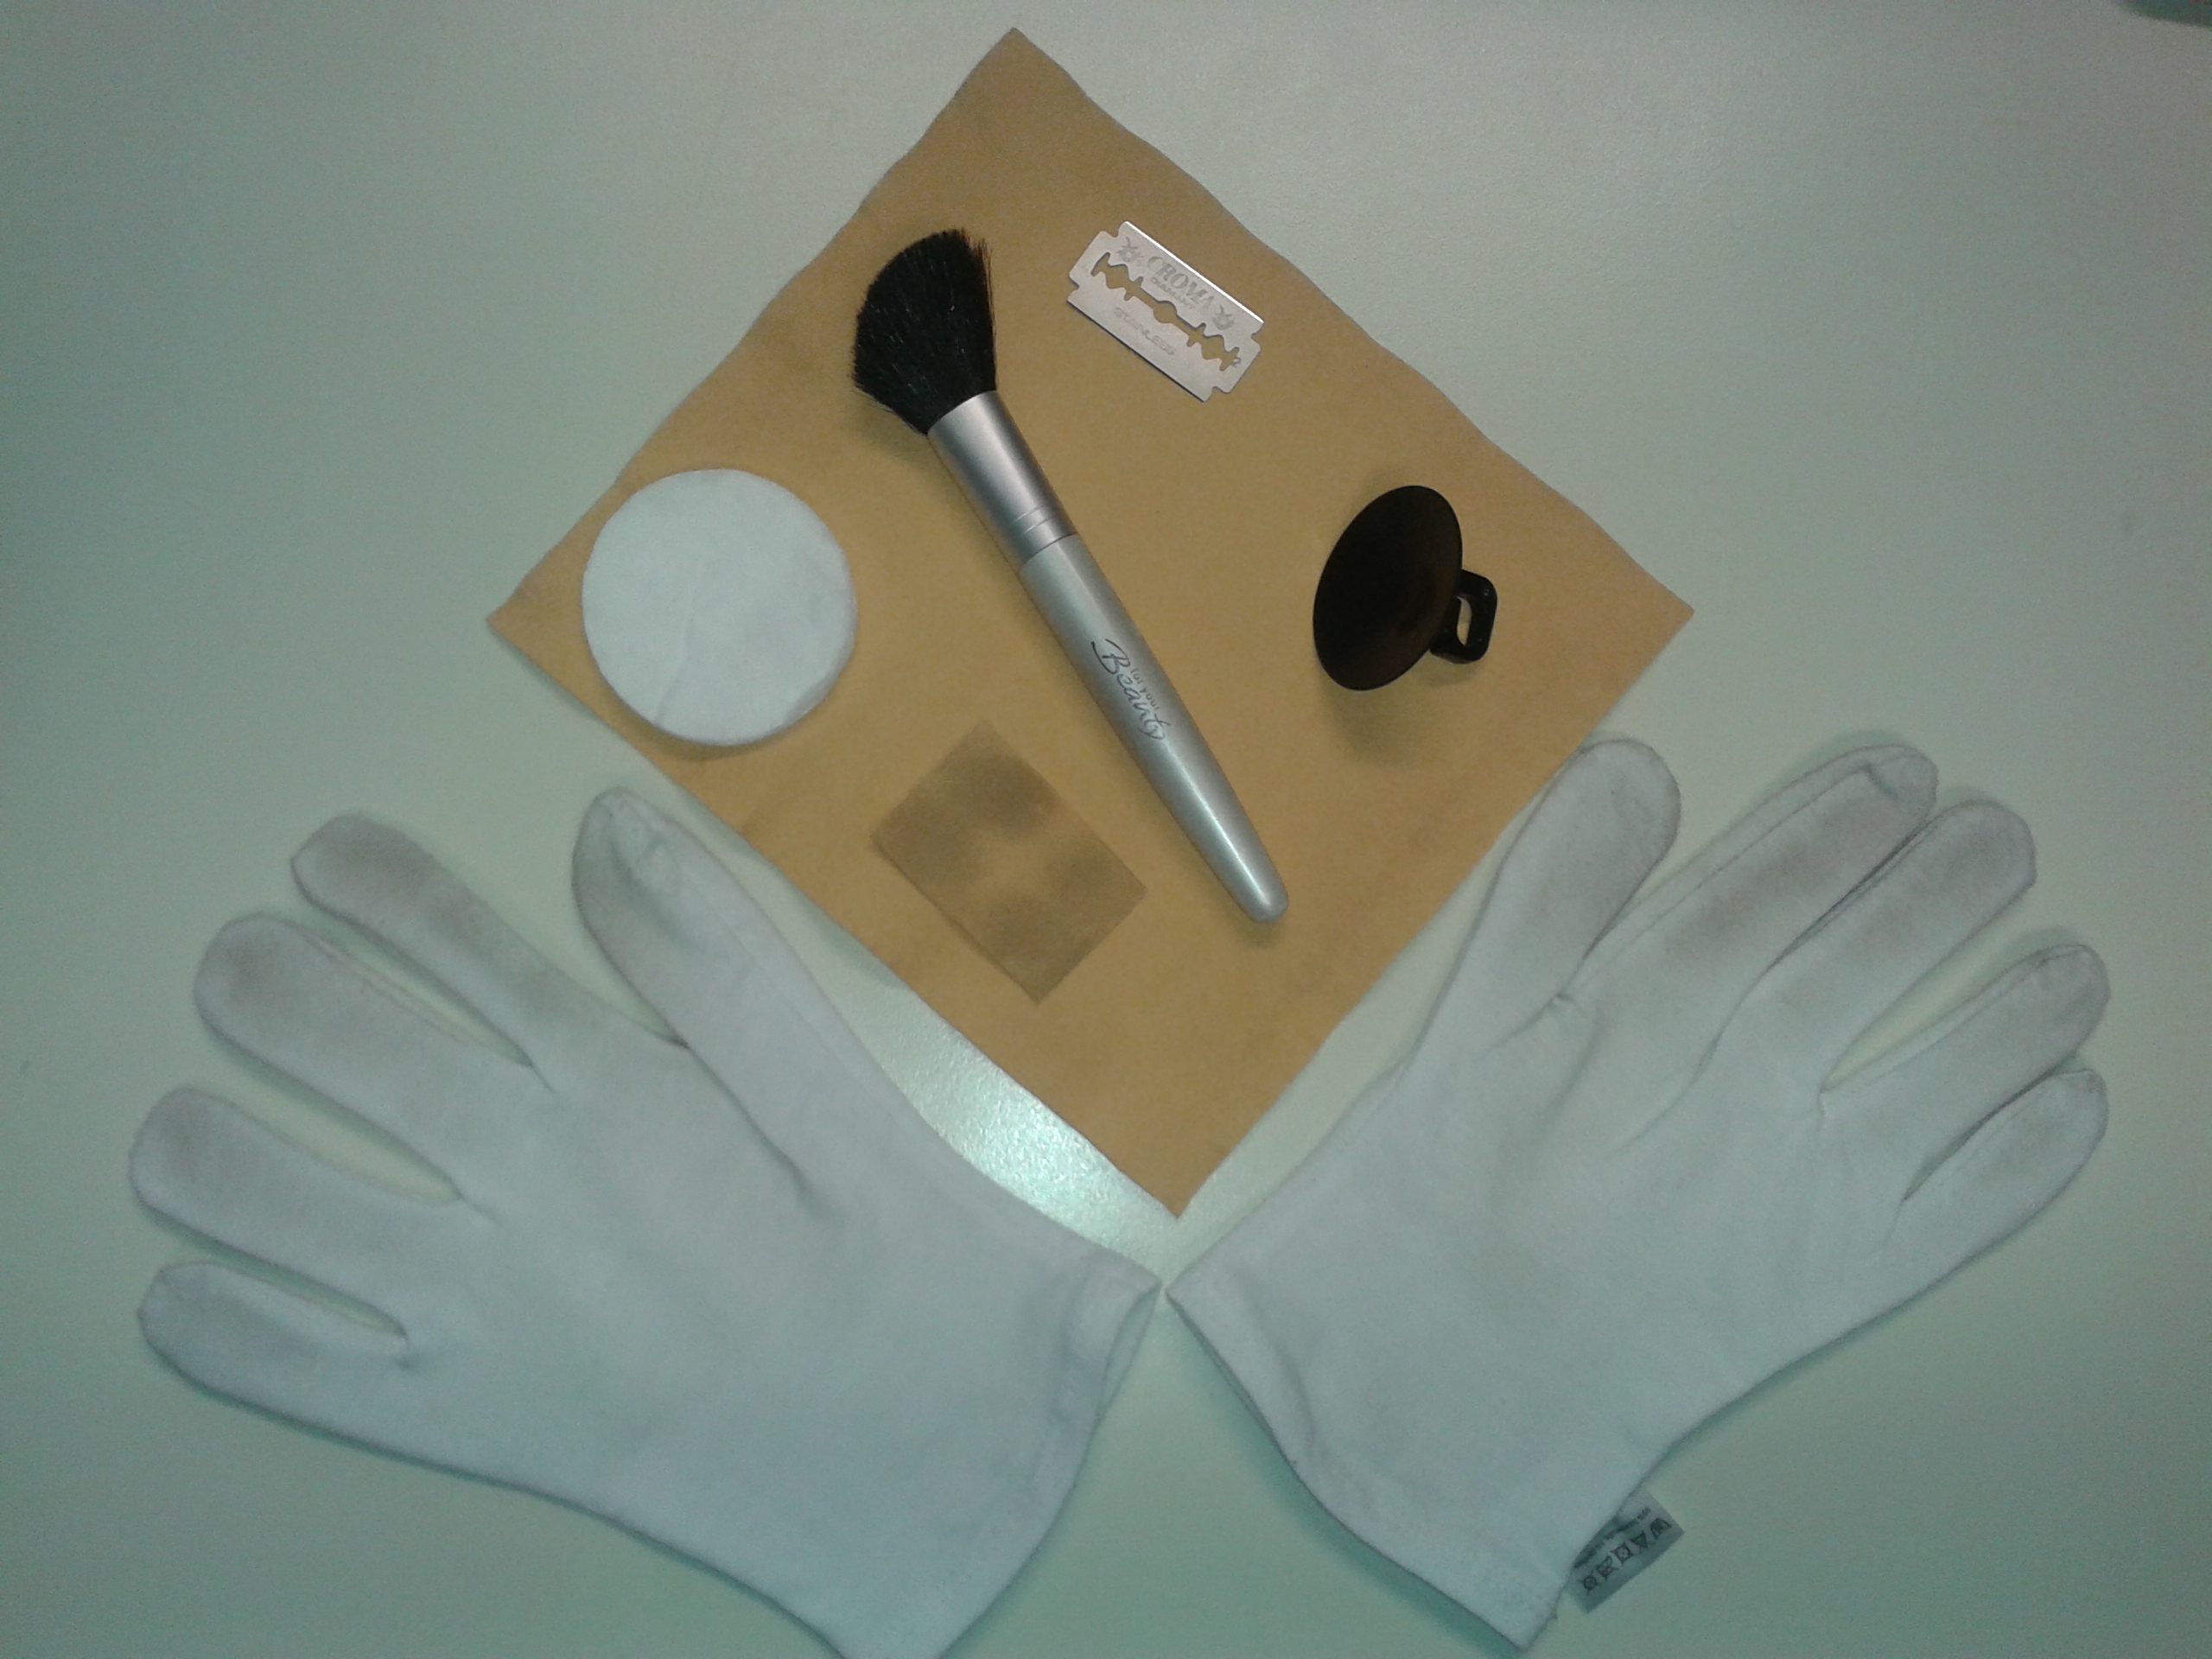
After the preparation of low resolution images the glass side of each plate has to be cleaned. Whith gloves on your hands take a plate and put it with its emulsion side down on a piece of microfibre cloth used for glass cleaning. It is important to use microfibre material, because it leaves no lint or dust. Also, it is very soft and dry, so that the emulsion cannot be damaged. Slightly moisten a cotton pad with distilled water (it shouldn't be dripping when pressed) and softly rub the glass surface. Then take a small piece of microfibre cloth and carefully rub the glass surface. In some cases you might need pure alcohol instead of distilled water. If multiple attempts of rubbing do not clean the surface you might need to use a razor blade. Use it very carefully by applying it at a very flat angle towards the glass plane for not to scratch the glass. After the wet and dry cleaning is done, polish the cleaned surface with a piece of soft textile material.
Depending on your experience and the size of a plate and how dirty it is, it can take from 1 to 10 minutes to properly clean it, only in rare cases you might spend more time on it.
Very old plate envelopes are not seldom in poor conditions, hence, at the AIP, a cleaned plate is put into a new envelope made of Tyvek, a synthetic material.
Acquisition of a high resolution plate image
At the AIP, the Epson Expression 10000XL flatbed scanner is used to obtain high resolution images. You can use any other scanner capable of 2400 dpi optical resolution.
Put on your cotton gloves. Clean the surface of the scanner's plate with a large soft brush. Don't try to blow the dust off with your breath, because it will inevitably moisten the surface. At the AIP, a plastic frame is used to align a plate on the scanner's plate. With a suction cup applied at the centre of the photographic plate's glass side pick it up carefully and immediately hold your other hand under the plate just to make sure that if the suction cup unexpectedly releases the plate then it wouldn't fall down and break apart, you would immediately catch it with your hand. Be careful! Slowly put the plate onto the scanner's surface with the emulsion side down. Again clean the plate and the surrounding area with the brush. Dust will always be your worst enemy, use the brush as often as possible. At the AIP, every plate is digitized together with a gray-scale wedge, which is put right at the lower side of it. If your scanner's surface is large enough, you can put two or more plates side by side. Close the scanner cover.
At the AIP, we started our digitization project with a Windows machine, the scanning software in use was then VueScan (by Hamrick). A few months later we switched to a Ubuntu Linux machine, from that moment on we use XSane.
The proper settings of your scanning software are crucial. The following features have to be set in the XSane main window:
|
number of pages to scan: 1 XSane mode: Preview (= you will have a preview of the full resolution scan before you save it) counter step width: 0 type: TIFF scan source: Transparency Unit scanmode: Gray source medium type: Full color range scan resolution: 2400 dpi medium selection: full range gamma value: 1 brightness: 0 contrast: 0 |
In the standard options window you have to set the bit depth to 16 bit, select the sharpness value 0 and gamma correction as 'user defined'. In the advanced options window you have to select the focus position: 'focus on glass' if you scan plates with the emulsion side lying exactly on the scanner's plate surface, or 'focus 2.5mm above glass' if you scan plates while using a special frame-bed to hold up the plate slightly above the scanner's glass. In the setup window (accessible via 'Preferences' in the menu of the main window) open the filetype tab and set the 'TIFF 16 bit image compression' to 'no compression'. If you haven't done that and have scanned with 'pack bits', you are lucky, because this is a lossless compression method, you can easily decompress those TIFFs. Also, on the enhancement tab deselect 'Autoenhance gamma' and 'Autocorrect colors'. (All settings can be saved: in the main window go to 'Preferences' in the menu, click 'Save device settings'. Normally, on start-up XSane loads the last used settings, but to ensure that you use correct settings for scanning it is better to manually load the saved settings in the same menu.)
In the preview window select 'full size' area and click the 'Acquire preview' button to get a fast preview scan of the entire scanner's surface. Then draw a selection rectangle around the proper plate image with some little space beyond the borders of the plate. Zoom in by clicking the 'zoom into selected area' button. Adjust the top-bottom and left-right borders of the selection rectangle so that they fit the plate perfectly (if necessary, use the 'Geometry' pane of the advanced options window to precisely adjust by clicking on arrows with exactness to 0.001 cm). Start the full resolution scan by clicking the 'Scan' button on the main window. Upon scanning, a preview window of the scanned image will appear, inspect it shortly, save the TIFF file under a proper file name.
[gallery columns="6" ids="1959,1960,1961,1962,1963,1964"]